
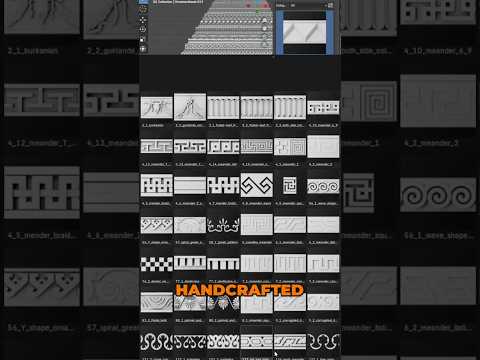
Handcrafted Ornaments for Blender — Premium Detail Quality
The Short shows the idea quickly. This guide expands it into a production-focused workflow: what matters, where the common problems are and when the technique is actually useful.
High-detail ornament geometry looks impressive in a close-up, but more polygons are not automatically a better solution. The right representation depends on camera distance, silhouette, lighting, deformation and where the asset will finally be used.
The decision starts with the final shot
Optimization decisions are easiest when you know how the object will be seen. A decorative column filling half of a 4K frame has very different needs from the same column used fifty meters from the camera in a game environment.
If the detail is large enough to affect the silhouette or cast visible shadows, geometry usually earns its cost. If it only changes how light reacts across an otherwise flat surface, normal or displacement information may be enough.
When real geometry wins
Real geometry is strongest in hero assets, architectural close-ups, product visualization and any render where light grazes across the surface. Small bevels, cavities and raised edges create highlights that react naturally as the camera or light moves.
Geometry is also useful when the ornament must be edited as a physical shape: booleaned, broken, scanned, 3D printed, viewed from extreme angles or animated in a way that exposes its depth.
When a normal map is the smarter choice
Normal maps are excellent for dense repeated micro-detail that does not need to change the silhouette. A game wall may contain hundreds of carved details, but if the player never gets close enough to see their true depth, storing every groove as geometry wastes memory and increases draw complexity.
The normal map approach also makes duplication cheap. Once a high-resolution ornament is baked correctly, the low-poly version can be repeated across many assets without carrying the original mesh density.
Displacement sits between the two
Displacement is useful when you need actual surface relief but do not want to model every ridge manually. In offline rendering, subdivision plus displacement can produce convincing carved surfaces. The trade-off is that the mesh still needs enough subdivision, and the displacement setup must be stable enough for the final renderer.
For shallow relief, displacement can be a useful middle ground. For deep undercuts or separated ornamental forms, explicit geometry is generally more predictable.
Use a hybrid workflow
A production-friendly approach is often hybrid: keep the large ornamental shapes as geometry and bake the tiny engraved detail into maps. The geometry carries the silhouette and major shadows; the texture carries scratches, small grooves and surface breakup.
This gives you visual richness without turning every asset into a multi-million-polygon object. It also makes LOD creation easier because you can progressively remove geometry while preserving much of the perceived detail through textures.
Optimize after the visual hierarchy is clear
Do not decimate everything at the start. First identify which parts actually contribute to the read of the ornament. Large curves and important borders deserve cleaner topology. Tiny internal filigree can often tolerate stronger reduction.
In Blender, Decimate can help on dense decorative meshes, but inspect the result under the final lighting. A technically impressive polygon reduction is useless if it destroys the highlight pattern that made the ornament attractive in the first place.
How this applies to reusable ornament tools
A real-geometry system such as Ornament Generator is particularly useful while designing and rendering detailed assets because every ornament remains a physical object. When a lighter result is needed, the generated high-detail geometry can also become the source for baking normal maps.
That turns the same ornament into both a high-end rendering asset and a source asset for optimized realtime versions instead of forcing you to rebuild the design twice.
Before you commit the detail
- Judge the asset from the final camera distance, not only in close-up.
- Keep the controlling path editable until the composition is approved.
- Test one repeat unit before generating a long ornamental strip or chain.
- Optimize the source module before repeating it hundreds of times.
- Use automation to remove repetitive setup, not to replace design decisions.
See real-geometry Ornament Generator
The addon is linked here because it automates the repetitive part of the workflow discussed above. The modeling principles remain useful even when you build the setup manually.
Watch the original YouTube Short: Handcrafted Ornaments for Blender — Premium Detail Quality